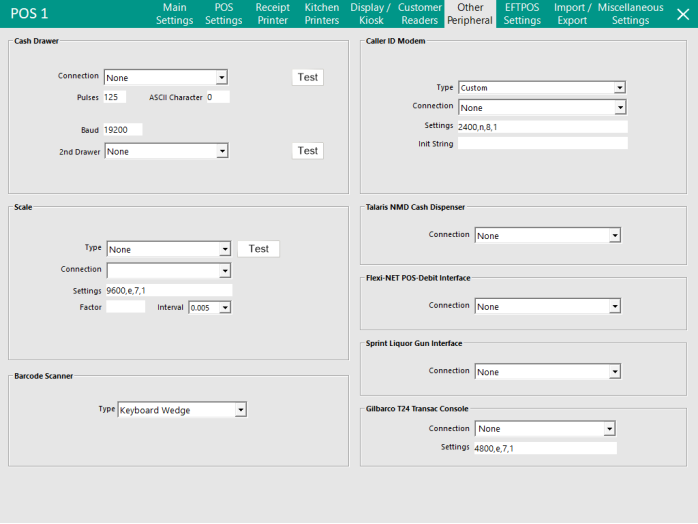
This tab is used to set up different types of hardware that can be used with Idealpos.
There are 8 separate peripherals that can be connected which are listed as follows:
Idealpos can support the connection of 2 Cash Drawers per Terminal.
This is dependent on the terminal having multiple ports.
There is also the ability to adjust the pulses that are sent to the Cash Drawer, but these should not be changed unless direct to do so.
Idealpos currently supports connection to the following:
Once a Cash Drawer is connected you can press the Test button to ensure it will work correctly.
If you have connected the Cash Drawer via the Receipt Printer, you will need to test the printer before the Cash Drawer will work.
It is possible to install a USB to RJ45 connector, which will create a COM Port for use, to add a second Cash Drawer, or some terminals will have support for 2 drawers.
Idealpos will also support the ability to set a baud rate for both cash drawers.
If you change the baud rate from the default setting, this will affect both cash drawers connected to the terminal.
It is advised to have the same cash drawer connected to both ports to ensure correct communication.
If a cash drawer is configured in an OPOS application (such as the EPSON OPOS), it can be used by Idealpos.
Firstly, ensure that the Cash Drawer is configured and working correctly in the third-party OPOS utility. Take note of the name that was assigned to the cash drawer in OPOS.
Once this has been done, configure the Cash Drawer in Idealpos by selecting the "OPOS" option from the Connection dropdown list.
Finally, enter the name that was assigned to the Cash Drawer in OPOS into the field that appears next to the Connection/2nd Drawer dropdown box and before the test button as indicated in the below example.
The below example shows a generic name of OPOSCashDr1 and OPOSCashDr2.
Substitute OPOSCashDr1/OPOSCashDr2 with the name that was assigned to the Cash Drawer(s) in OPOS.
If a cash drawer is not is not natively supported by Idealpos, it could still be configured to work through a User-Defined Option.
In the Connection and/or 2nd Drawer drop-down menus select User-Defined.
Go to POS Settings tab > User-Defined Options > Add > Desc: DRAWER1PATH/DRAWER2PATH > Setting: Location of the .exe file that fires the cash drawer.
The VPOS 317 Cash Drawer Kicker will function properly with the settings configured below.
Idealpos supports the connection of a Scale to weigh a unit of product for sale, and sell the items based on a price per weight.
Only 1 Scale can be connected to a POS terminal at any one time.
When setting up the Scale, you will be required to set the Interval of either 0.005 or 0.002, this is for compliance with Australian Weights and Measures.
Supported Scale Models are:
For more information on how to configure Scales, refer to the Scales topic.
Some Barcode Scanners are not simply “Plug and Play” and need to be configured before they will work in Idealpos.
Supported models are:
To setup and configure these scanners will require the use of the OPOSCfgUtil.exe application.
More information on this utility and setup can be found in the Barcode Scanning topic.
The Caller ID Modem is for obtaining customers phone numbers through the POS system when they call, and linking them to sales or reservations.
Further information on how to configure Caller ID can be found in the Caller ID topic.
The Talaris NMD Cash Dispenser is used to dispense $20 and $50 notes using the Idealpos system.
You set the connection to the system by selecting a COM Port from the drop-down box.
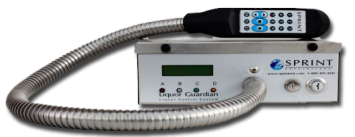
This interface allows for the Sprint Liquor Gun to be connected to Idealpos to ensure correct calculation of beverages.
For more information visit the Sprint website.

Go to File > Stock Control > Stock Items > Add/Modify > Stock Code: Number must match the stock code in Sprint > Save.
A clerk must be logged in for the Sprint system to dispense from the gun.
When the clerk presses the button for the product to dispense, the Stock Code will be sent to Idealpos where it can be processed as a sale.
The use of the Gilbarco T24 Transac Console is for Service Station environments that sell fuel.
There are specific settings that must be used when setting this product.
This setting is also able to be used for the FC6000 fuel console.
Select the COM Port and enter the settings as 4800,e,7,1.